Accurate measurements are crucial for a successful kitchen cabinet installation. Even a small mistake in measurement can lead to expensive problems, such as ordering the wrong cabinet sizes or finding gaps during installation. These errors often result in unexpected costs and delays for homeowners.
Many DIY enthusiasts make common measurement mistakes:
- Not considering appliance sizes
- Ignoring wall imperfections
- Overlooking important details like window trim and baseboards
- Forgetting to measure variations in ceiling height
With over 30 years of experience helping homeowners overcome these challenges, Instile Cabinet Outlet is here to make your kitchen remodeling process easier. Our specialized knowledge ensures that your measurements will result in perfectly fitting cabinets that make the most of your space and match your vision.
This guide will walk you through the essential steps of measuring your kitchen for new cabinets. By following these steps, you can avoid potential mistakes and achieve professional-level accuracy in your measurements.
Choosing the Right Cabinet Style
Once you’ve taken accurate measurements, the next step is selecting the right cabinet style that fits both your space and aesthetic preferences. At Instile Cabinet Outlet, we offer a wide range of cabinetry options. For instance, our Rustic Gray from GoldenHome offers a charming rustic appeal, while our Allure / Fusion / Stone line provides a contemporary twist on traditional cabinetry with its distinctive detail and classic characteristics.
If you’re leaning towards a more modern look, consider our Allure / Luna / Dove line which creates a polished look with a modern flair. Alternatively, if you’re looking for something versatile that fits both modern and traditional spaces, our Dove off-white color might be perfect for you.
For those seeking solid wood options, our Nova from 21st Century Cabinetry offers superior quality with features such as soft close drawer and doors, while our Concorde White (CW) from JWQ Cabinetry provides a premium finish with its solid birch wood construction.
By following this guide and leveraging our expertise at Instile Cabinet Outlet, you can avoid costly mistakes and achieve the kitchen of your dreams.
Step 1: Preparation for Measuring
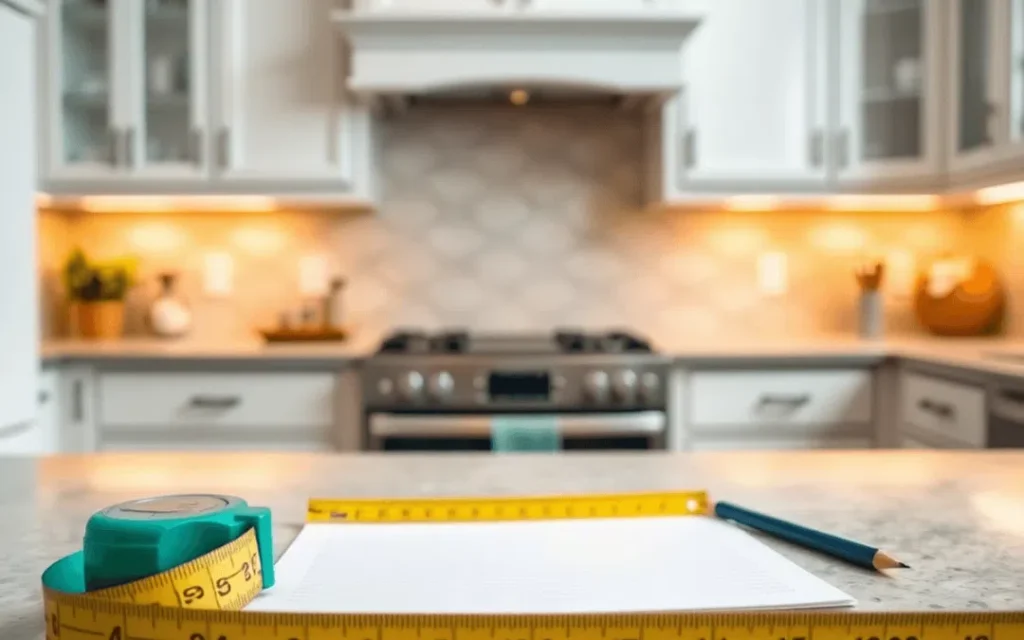
Successful cabinet measurements start with gathering the right tools and creating optimal conditions. Here’s what you’ll need:
Essential Tools:
- Metal tape measure (25-foot minimum)
- Graph paper (1/4-inch squares work best)
- Sharp pencils and eraser
- Calculator
- Level tool
- Digital camera/smartphone
- Notepad for additional notes
Creating the Right Environment:
- Clear the kitchen space of obstacles
- Remove items from countertops
- Open all cabinet doors and drawers
- Turn on all available lights
- Clean surfaces for accurate measurements
Pro Tips:
- Use natural daylight when possible
- Take measurements during quiet hours
- Keep tools within arm’s reach
- Double-check battery life for digital tools
- Have a helper for longer measurements
- Take photos of challenging areas
A well-prepared measuring session reduces errors and saves time. Consider laying out your tools on a cleared counter space before starting, creating an efficient workflow station for your measuring project.
When measuring for cabinets, it’s also essential to have an idea of the style and finish you want. For instance, you might be interested in a Lacquer White from GoldenHome, or perhaps a Gray Shaker from GoldenHome. If you’re leaning towards a more modern look, consider the Yarmouth Slab from JSI Cabinetry or the Matte White from GoldenHome. Alternatively, if you prefer a classic finish, options like the Dover White from JSI Cabinetry could be perfect for you.
Step 2: Sketching Your Kitchen Layout
Creating an accurate sketch of your kitchen layout serves as the foundation for precise cabinet measurements. Start by selecting graph paper where each square represents a specific measurement (like 3 inches or 6 inches) to maintain proportional accuracy.
1. Draw the Perimeter Walls
Draw your kitchen’s perimeter walls as straight lines, marking them with actual measurements.
2. Represent Doors, Windows, and Fixed Elements
Use distinct symbols to represent:
- Doors: Draw as arcs to show swing direction
- Windows: Mark with double parallel lines
- Fixed Elements: Include plumbing locations, gas lines, HVAC vents, and electrical panels
3. Label Each Element
Label each element with specific measurements:
- Height from floor to ceiling
- Width of openings
- Distance between features
4. Create a Legend
Create a legend at the bottom of your sketch to explain your symbols and measurements. This helps prevent confusion when sharing your plans with contractors or cabinet manufacturers.
A clean, well-organized sketch eliminates guesswork and ensures accurate cabinet ordering. Consider using different colored pencils for various elements to enhance readability and distinguish between existing features and planned modifications.
Once you’ve finalized your layout, it’s time to consider the type of cabinets that will best suit your design. For a modern aesthetic, you might want to explore options like the Onyx line which features clean-cut, shaker-style cabinets that can complement both modern and traditional kitchens. Alternatively, if you’re leaning towards a shaker inspired door style with crisp lines, the Hawthorne Cinnamon from Ideal Cabinetry could be an ideal choice.
For those seeking a more unique finish, consider the Concrete from GoldenHome or the Matte Ash from GoldenHome, both of which offer distinct styles that can elevate your kitchen’s overall look. Lastly, if you’re interested in solid wood options, the Venus Truffle from FGM Cabinetry provides high-quality craftsmanship with full-overlay solid wood door panels and soft-close features.
Step 3: Measuring Walls and Fixed Features
Accurate wall measurements are crucial for your kitchen cabinet project. Begin by measuring the length of each wall segment, starting from one corner of your kitchen and going up to breaks like doorways or windows. Make sure to record these measurements in inches, paying attention to even the smallest variations that could affect how the cabinets fit.
Measuring Wall Segments
- Base measurements: Measure at counter height (36 inches from floor)
- Upper measurements: Measure at upper cabinet height (54 inches from floor)
- Ceiling height: Take measurements in multiple spots to identify slope variations
Door and Window Dimensions
- Record the exact width of door frames from trim to trim
- Measure window dimensions including:
- Distance from floor to window sill
- Total window height with trim
- Width including surrounding trim
- Note swing direction of all doors
Fixed Features Documentation
- Mark plumbing locations:
- Sink drain position
- Water supply lines
- Gas line placement
- Identify electrical elements:
- Outlet positions
- Switch locations
- Light fixture placement
Instile Cabinet Outlet suggests double-checking these measurements, as even small mistakes can cause big problems during installation. Use a laser level to check if the walls are straight and mark any bumps or irregularities that might affect how the cabinets are mounted.
Don’t forget to document any HVAC vents, radiators, or other permanent fixtures that could impact where the cabinets go. These elements might require special modifications or creative solutions to ensure everything fits and works properly.
If you have specific styles in mind for your cabinets, such as the Hampton Designer Series from Adornus or the Hudson Snow White from Tribeca Cabinetry, make sure to consider their dimensions and design details when taking measurements.
Step 4: Detailed Measurements
Accurate measurements of your existing appliances are crucial for creating a well-designed kitchen layout. Follow these steps to ensure you have all the necessary dimensions:
Measuring Appliances
Start by measuring the width, height, and depth of each appliance that will remain in your kitchen:
- Refrigerator: Include extra space for ventilation (typically 1 inch on sides and top)
- Dishwasher: Standard size is 24 inches wide, but verify your model’s specifications
- Range/Cooktop: Measure both the appliance and any required clearance space
- Microwave: Note mounting requirements if it’s built-in
Measuring Base Cabinets
For base cabinet dimensions, measure:
- Height from floor to countertop (standard is 36 inches)
- Depth from wall to cabinet front (typically 24 inches)
- Width of existing cabinet sections
- Toe kick height and depth (usually 4 inches high, 3 inches deep)
Measuring Wall Cabinets
Wall cabinet measurements require:
- Distance between countertop and cabinet bottom (18 inches standard)
- Cabinet height (30, 36, or 42 inches typical)
- Total height from floor to ceiling
Marking Electrical Outlets
Mark electrical outlet locations with these details:
- Height from floor
- Distance from nearest wall
- Type of outlet (GFCI, standard, or special appliance circuits)
These measurements help ensure your new cabinets accommodate both existing features and building codes while maintaining proper clearances for daily use.
If you’re considering a kitchen update, replacing the cabinets could breathe new life into the space. For instance, a sleek neutral tone like the Tiverton Pebble Grey from Ideal Cabinetry can complement stainless steel appliances while providing a timeless appeal.
Step 5: Accuracy Check – Ensuring Precision
A thorough accuracy check prevents costly mistakes during cabinet installation. Double-check your measurements by comparing the sum of individual wall segments against the total wall length. Any discrepancy indicates a potential measurement error that needs immediate attention.
Here’s a reliable verification process:
- Measure each wall twice – once from left to right, then right to left
- Compare diagonal measurements in square rooms – they should be identical
- Use a laser level to check wall straightness and identify any bowing
- Mark reference points on your sketch to cross-reference measurements
Common measurement errors often stem from:
- Failing to account for wall thickness at corners
- Overlooking slight variations in floor level
- Misreading tape measure increments
- Not considering trim or molding depths
For enhanced precision, document your measurements using detailed photographs alongside written notes. This visual reference helps identify potential discrepancies and serves as a valuable backup to your written measurements.
Common Pitfalls in Kitchen Measurements and How to Avoid Them
Accurate kitchen measurements require attention to often-overlooked details that can significantly impact your cabinet installation. Here are critical elements that demand your focus:
Countertop Overhangs
- Standard overhang measurements: 1.5 inches for base cabinets
- Island overhangs: typically 12 inches for seating areas
- Corner cabinet clearances: minimum 2-inch allowance for hardware
Uneven Surfaces
- Check wall angles with a level tool
- Measure floor-to-ceiling height at multiple points
- Document any bulges or recesses in walls
- Note variations exceeding 1/8 inch
Utility Considerations
- Mark locations of:
- Water lines and shut-off valves
- Gas connections
- Electrical outlets
- HVAC vents
- Allow 3-inch clearance around utility points
- Consider future appliance upgrades that might require additional utility access
These measurement details might seem minor but can create significant challenges during installation. A 1/4-inch error in wall measurements can result in visible gaps or prevent drawers from opening properly. Recording utility locations helps prevent costly modifications after cabinet installation begins.
Remember to account for trim work and moldings in your measurements. These elements can affect cabinet placement and might require specific allowances in your calculations.
When selecting cabinets, consider options like the Co66 Cinnamon-glazed Traditional from J&K Cabinetry, known for its solid wood construction and soft-close features. Alternatively, the Allure Luna Kona offers a polished look with a modern flair, while the K3 Greige Transitional from J&K Cabinetry provides a versatile style suitable for various designs. For those seeking a simpler yet fashionable option, the Quest Metro Mist line could be an ideal choice, offering convenience with its overlay drawers.
Advanced Measuring Techniques for Enhanced Accuracy
Modern technology has changed the way we measure spaces for kitchen cabinets. Digital tools now offer precision that surpasses traditional measuring methods.
Laser Measuring Tools
Laser measuring devices provide exceptional accuracy with features that benefit cabinet planning:
- Instant measurements up to 100 feet with accuracy within 1/16 inch
- Digital level function to detect wall angles and slopes
- Area calculation capabilities for complex spaces
- Memory storage for multiple measurements
- Bluetooth connectivity to transfer data to design software
Smart Technology Solutions
Your smartphone can become a powerful measuring assistant with specialized apps:
- MagicPlan: Creates digital floor plans through your camera
- RoomScan Pro: Generates room layouts by touching walls with your phone
- AR Ruler: Uses augmented reality for real-time measurements
- Cabinet Vision: Specifically designed for kitchen cabinet planning
These digital tools eliminate common human errors:
- No tape measure sagging
- Reduced mathematical calculation errors
- Precise corner and angle measurements
- Digital documentation for easy sharing with contractors
The combination of laser tools and smartphone apps creates a comprehensive measuring system that enhances accuracy and streamlines the cabinet planning process. These technologies work together to provide detailed spatial information essential for perfect cabinet fit.
Creating a Detailed Sketch with Labels for Seamless Planning
A well-labeled kitchen sketch serves as your visual roadmap for cabinet installation. Start by dividing your kitchen layout into distinct zones, assigning letters (A, B, C) to walls and numbers (1, 2, 3) to cabinets. This systematic labeling approach creates clear reference points for measurements and planning.
Essential Elements to Include:
- Wall Labels: Mark each wall with capital letters, starting from your main entrance
- Cabinet Positions: Number each cabinet space sequentially
- Utility Points: Label electrical outlets with “E” and plumbing fixtures with “P”
- Fixed Features: Mark windows as “W” and doors as “D”
Structural Details to Document:
- Ceiling height variations
- Soffit locations and dimensions
- Load-bearing walls
- HVAC vents and returns
- Light fixture positions
- Gas line locations
Create a legend at the bottom of your sketch to explain your labeling system. Use different colors for various elements – red for electrical, blue for plumbing, green for windows and doors. This color-coding system helps identify potential installation challenges at a glance.
Add detailed notes directly on your sketch about unique features or potential concerns. Include specific measurements in both inches and centimeters for extra precision. Keep your handwriting clear and legible, using block letters for better readability.
When to Consult Professionals for Expert Guidance
Professional cabinet designers bring invaluable expertise to complex kitchen layouts and unique design challenges. Consider seeking expert assistance when:
- Your kitchen has irregular angles or curved walls
- You’re planning significant structural changes
- Multiple appliances need precise integration
- Custom solutions are required for unusual spaces
- You’re uncertain about building codes or permits
Expert guidance helps prevent costly measurement errors and ensures optimal cabinet placement. Professional designers possess specialized knowledge of:
- Space optimization techniques
- Current design trends and materials
- Building regulations and safety standards
- Advanced measurement tools and methods
- Creative solutions for challenging layouts
A professional consultation can transform your kitchen remodeling project from stressful to seamless. Cabinet experts not only verify your measurements but also provide insights into design possibilities you might not have considered. Their experience helps identify potential issues before they become expensive problems during installation.
If you’re ready to start your kitchen transformation, consider the Greystone Shaker or Ice White Shaker from our collection, which are perfect for any layout or color scheme. For a more elegant touch, the Townsquare Grey could be the right fit. Our professional design team is here to provide expert guidance on measurements and custom cabinet solutions.